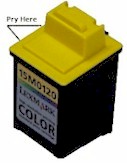
| There are over 300 different ink cartridges on the market, and each refills differently, so it's critical to have the correct instructions and tools for your cartridge. Our refill kits and instructions are individually designed for each different cartridge - Click Here to find the right refill kit for your printer.
Here are general ink refill procedures to give you a good idea of what's involved:
First, locate (or make) a fill hole
Some cartridges already have a hole that you can directly inject ink through, but it's not always easy to find. Our refill instructions will specifically tell you where the refill hole is and how to get to it (Figure 1).
Other cartridges, however, don't have a existing hole, so you have to make a hole in the cartridge in order to inject ink into it. Some generic refill kits come with a small drill to create a hole, but we feel that the small plastic shavings that the drill creates will mix with the
ink and ultimately clog the cartridge. Our kits use a hot paperclip to burn a small hole in the plastic, which doesn't create any cartridge-clogging plastic shavings.
Second, inject the correct ink into the cartridge.
Once you have the hole you use it to inject ink into the cartridge (Figure 2). All cartridges use different inks (with different color shades, chemical properties and thickness), so it's important to inject ink which matches the original ink as closely
as possible. The ink which comes with our refill kits is manufactured specifically for the cartridge it was ordered for - we don't have a 'one ink fits all' refill kit.
Injecting ink into a black cartridge is straight-forward, because there is only one color ink (black) in a black cartridge, but injecting ink into a color cartridge can be tricky, because there are usually three different color inks (cyan, magenta and yellow)0 in a yellow cartridge, and
it's critical to get the correct ink into the correct compartment in the cartridge. Our instructions tell you exactly where each ink color should be injected (Figure 3).
Third, reseal the fill hole (or not)
Depending on the cartridge, the last step is to reseal the fill hole (or not). This is where many refillers make their mistake - some cartridges need to be resealed airtight in order to work, and other cartridges won't work unless they are left 'unsealed'. Again, our detailed
instructions will let you know whether your cartridge needs to be re-sealed, and if so, how to do it. |
|

|
|
Figure 1
An example of a cartridge with a 'hidden' fill hole |
|